Numbering 95 across the game, Merlin's Trials are prominent in Hogwarts Legacy. They increase the number of equipment slots. All of them require sweet mallow to be activated, as well as certain spells to defeat them. Merlin's Trials of Hogwarts Valley are no exception to this rule, requiring different spells.
Hogwarts Vale Merlin Trials List and Location
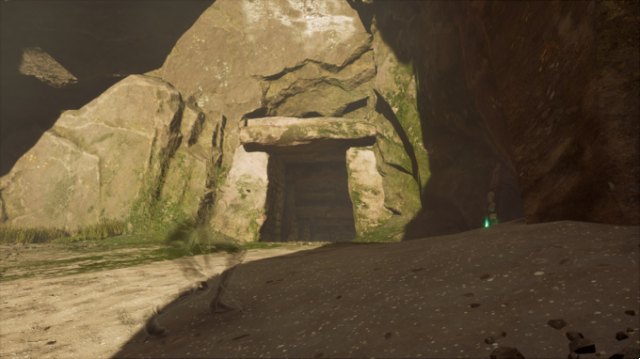
Sweet Mallow can be obtained from the Magic Turnip vendor in Hogsmeade. The latter also sells seeds to grow yourself. Merlin's Trials are visible on the map as you pass by, making them easy to spot even in the Hogwarts Valley.
Spell Required: None
Once the test is activated, climb on the pillars opposite to jump from one to the other without touching the ground.

Spell Needed: Lumos
Once the test is activated, bring the 3 clouds of butterflies back to their receptacle. The first is to the east, the second to the north and the last to the west.

Sort nécessaire : Crushing / Repelling
Once the test is activated, head south of the village to find a hollow receptacle. Release the latter with a fire spell before going up the slope to find the stone ball to push into it.

Spell Required: None
Once the trial is activated, use Revelio to reveal all the effigies to be destroyed. The latter are on pillars, and can hide behind the rocks.

Spell Needed: Confringo
Once the test is activated, go to the level of the river to find braziers to light. The pillars are of different sizes, and the largest will be the slowest to go out.

Spell needed: Accio / Confringo
Once the test is activated, lure the rocks into their receptacle using Accio. The first is slightly to the west, and its pebbles hidden behind a high wall. The second to the south, at the edge of the cliff and its pebbles on the higher rocks. Finally, the last one is to the east, with stones hidden in a tent higher up.

Spell needed: Accio / Confringo
Once the test is activated, lure the rocks into their receptacle using Accio. The first is behind the gates with the wagons, the second at the level of the forge and the last behind the palisades, with stones blocked by a pile of vines.

Spell Needed: Confringo
Once the ordeal is activated, destroy the illuminated pillars using Confringo. You must destroy 5 in total to complete the test.

Spell Required: None
Once the trial is activated, use Revelio to reveal all the effigies to be destroyed. The latter are on pillars, and can hide behind the decorations. One of them is behind a stone wall.

Spell Needed: Lumos
Once the test is activated, bring the 3 clouds of butterflies back to their receptacle. The first is to the west, the second to the south, under the bridge at river level, and the last to the east.

Spell needed: Repulso
Once the test is activated, use Repulso to push the rock towards its receptacle. The rock is behind Fatimah Lawang's shop and must cross the village bridge.

Spell Required: None
Once the test is activated, jump from platform to platform without touching the ground to end the test.

Spell Required: None
Once the test is activated, jump from platform to platform without touching the ground to end the test. Start with the one on the left, and jump on the one in the center from the second platform before finishing.

Spell needed: Reparo / Confringo
Once the test is activated, use Reparo on the 3 pillars. The first is visible from the altar, the second is behind crates in the poachers' camp, and the last is in the hollow of the mountain, behind some vines.

Spell needed: Repulso
Once the test is activated, use Repulso to push the rock towards its receptacle. The boulder is near the goblin elevator and the receptacle at the bottom of the cliff.

Spell Needed: Confringo
Once the event is activated, light the 3 braziers within a given time. The taller pillar will take longer to extinguish. The test requires a little precision, each brazier being quite far away.